

If you have ever worked for odesk or elance, then you definitely know that it is required to create a video tutorial in some of their projects, yes it's obvious, and you may want to create a video tutorial not for free lancing but also for other reasons, then wink is the best suited software for you to do that, because it has a no of features that you should know about, a clear and easy to understand interface makes it easy to create a video tutorial with wink, you should have the software on your system, you can download it from www.debugmode.com/wink/, now i will tell you step by process to create a simple video with it -
- Click on the File>New.

- You will see a pop up on the screen immediatelyAs you can see here, you can select various options like, record audio, Frame per second speed, and many more, at last click on the ok button.

- Then it will show all the key board option on the next window and minimize to tray button, just press it.

- Go to System tray, there you will see wink icon just right click it and you will see a no of options capture now is for capturing just a picture, but by pressing start timed capture start the capturing of video.

- It will record audio also just attach your headphone and micro phone it will capture it. While recording you will see wink icon like this.

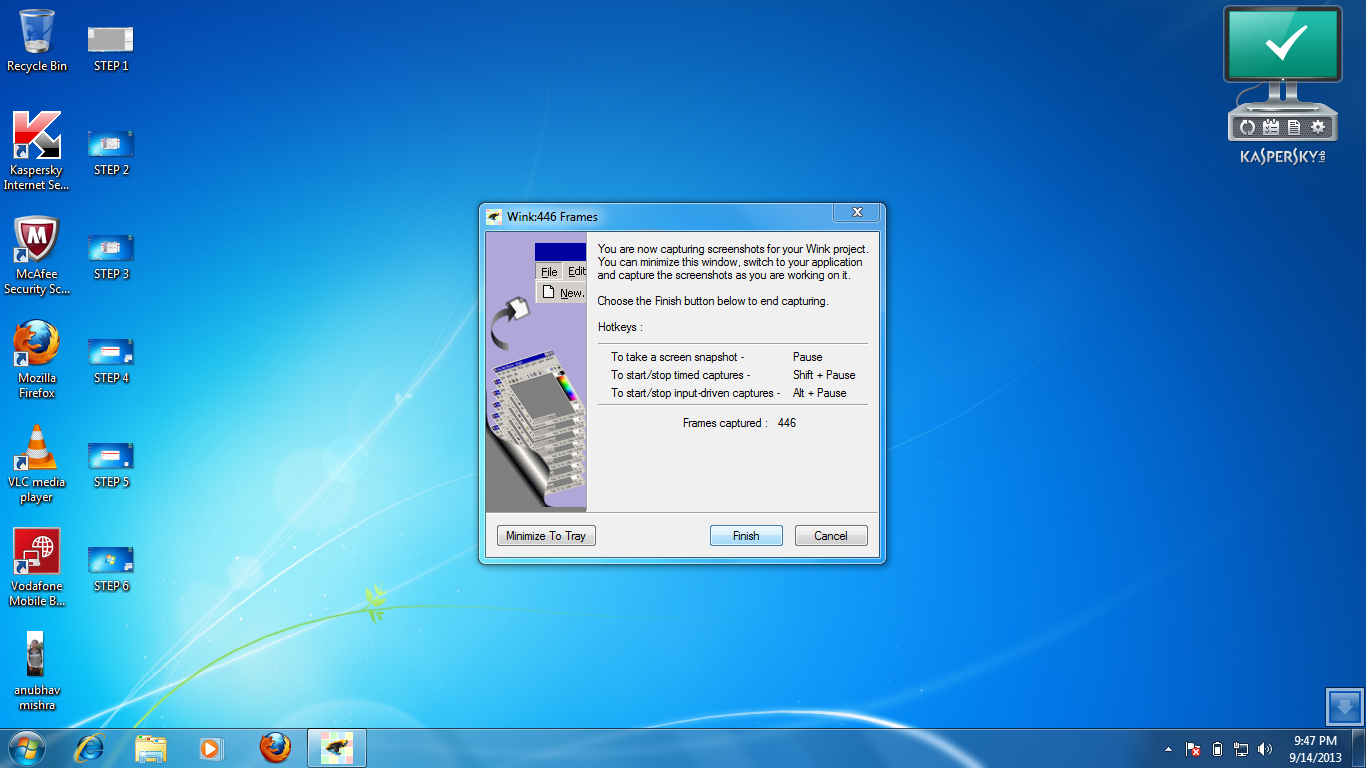
- At the end just right click it and stop it by pressing Stop Timed Capture.
- In the next window you will see an option to finish the capture.
- Next it's time for editing You can go to the upper right corner of the window and add some items in it, like-Add audio,Add Image,Add preset Shape,Add TextBox,Add previous button,Add Next button,Add goto url button,Add goto Frame button.

- Add Next button, and add a text box if you want on the first slide on pressing this the video will be started. and add goto frame button at the last slide to replay the video -and here is the last slide-


- At last just render the video and you are done-


You will get 3 files with same name of your project- html,javascript file,swf video file, you can also see the video by supported media player or by html file.


Very useful tutorial. Thanks for sharing :)
ReplyDeletethanks Khushboo, i am glad that you spent your time and came here, thank you for comment
DeleteThank you so much for your attractive post.Really this tutorial is more details step by step.
ReplyDeleteThanks for sharing.
Your welcome Rakhibul, keep visiting here
DeleteYourTutorials is beautiful.you are using that is very useful and helpful.Thanks for sharing a very informative article...
ReplyDelete